Showing posts with label Windows Tricks. Show all posts

Monday, 4 August 2014

How to Hack(Change Other System password)


How to Hack(Change Other System password) or Reset Your Forgotten Password In Windows.
Just Follow it :-

REQUIREMENTS :
1. Windows Installation Disk.
2. A simple Command Line.

Follow Below Simple Steps :

Step 1: Insert Your windows disk And Boot Your Pc.

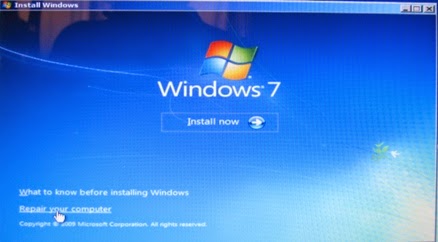
Step 2: Select " Repair Your Computer " From the lover Left Corner. Check the below Pic.

Step 3: Follow on Till you get the below screen , You need to click on Command Promt.

Step 4: Now The Real Trick,Type The below Command to backup the original Sticky keys File.
copy c:\windows\system32\sethc.exe c:\

Step 5: Now Copy The Command Prompt Executable on top of the sticky keys executable :

copy c:\windows\system32\cmd.exe c:\windows\system32\sethc.exe

Step 6: Now Reboot Your PC.

Step 7: After Rebooting your pc, You will see a login Screen, All You need to do is Hit Shift Key 5 Times, You will get a Command Promt.

Step 8 : Now to Reset Your Password just replace The Username and passoword with your own In Below line.

net user Freak MyNewPassword

Thats all Now you can Login.

you probably want to put the original sethc.exe file Back, Then You have to just reboot into the installation CD, Open the Command Promt Again and Copy The c:\sethc.exe file back to
c:\windows\system32\sethc.exe.

Enjoy, Keep Learning.

Sunday, 6 July 2014

ADMINISTRATOR ACCOUNT


உண்மையான முழு அதிகாரம் பெற்ற ADMINISTRATOR ACCOUNT பெறுவது எப்படி?-அனைவருக்கும் தேவை

ஒவ்வொரு நாளும் நமது கணினி புது விதமான ஆபத்தான சூழ்நிலைகளை எதிரிக்கொள்கிறது. தீர்வு தெரிந்த சிலர் அதை சரி செய்து கொள்கின்றனர், ஆனால் பலர் பிறரை நாடுகின்றனர் ஆதற்கு ஒரு தொகையை வேறு தருகின்றனர். இதை தவிப்பதற்காகவே இந்த பதிவு. பெரும்பாலும் அனைவரது கணினியிலும் ஏற்பட கூடிய ஓர் சிக்கலை தான் நாம் பார்க்க போகிறோம்.

ADMINISTRATIVE அக்கொண்ட் என்றால் என்ன?தெரியாதவர்கள் தெரிந்துக்கொள்ளுங்கள். ADMINISTRATIVE அக்கொண்ட் என்பது அனைத்து விதமான USER ACCOUNTS, STANDARD ACCOUNTS, GUEST அக்கொண்டிர்க்கும் தலைவர் என்பதை போலா. நம் கணினியில் அனைத்து விதமான செயலுக்கும் அனுமதி உள்ள ஓர் அக்கொண்ட் பெயர் தான் ADMINISTRATIVE ACCOUNT . இவரை கொண்டு தான் நாம் மற்ற USER ACCOUNTகளை கையாளுகிறோம். அனைத்து விதமான PERMISSION பெற்றது இந்த ADMINISTRATIVE அக்கொண்ட்.

ஓர் USER ACCOUNTக்கு சரியான அனுமதி இல்லையென்றால் மேற்குரிய படத்தில் காட்ட பட்டாற் போல தான் பிழை செய்தி கிடைக்கும். இந்த செயலை மேற்கொள்ள வேண்டும் என்றால் கண்டிப்பாக ADMINISTRATIVE அக்கொண்ட்யை கொண்டு தான் மேற்கொள்ள முடியும்.

பொதுவாக அனைவரும் ADMINISTRATIVE அக்கொண்டை அடிபடையாக கொண்ட ஓரு அக்கொண்டை தான் பயன்படுத்துவிர்கள். இதுவும் ADMINISTRATIVE அக்கொண்ட் தான். ஆனால் சில சமயங்களில் தங்களின் இந்த அக்கொண்ட் கூட காலவாரும். அப்படினா!!!! விண்டோஸ் ஆப்ரேட்ங் சிஸ்டம் உண்மையான் ADMINISTRATIVE அக்கொண்டை மறைத்து வைத்து உள்ளது. தாங்கள் பயன்படுத்தும் இந்த ADMINISTRATIVE அக்கொண்டை முழுமையானது அல்ல. உண்மையான ADMINISTRATIVE அக்கொண்டை தாங்கள் காண வேண்டும் என்றால் SAVEMODE சென்றால் மட்டுமே காண இயலும் பயன்படுத்த முடியும். இந்த முழு அதிகாரம் பெற்ற ADMINISTRATIVE அக்கொண்டை NORMAL LOG SCREENண்யில் பெறுவது எவ்வாறு என்பதை தான் நாம் பார்க்க இருக்கிறோம் நண்பர்களே.

பின் வரும் படி தாங்கள் செயல் மேற்கொண்டால் FULL RIGHTS ADMINISTRATIVE அக்கொண்டை தங்களின் லாகன் திறையில் தோன்றும் படி செய்யலாம். மேலும் தங்களின் கணினியின் முழு அதிகாரம் பெற்ற ஓர் உரிமையாளராக தாங்கள் தோன்றலாம்.

முதலின் இங்கு கீழே தரப்பட்டுள்ள லிங்க்யை கிளிக் செய்து ADMINISTRATIVE ACTIVATE.BAT என்னும் பைலை டவுன்லோட் செய்து கொள்ளுங்கள். பின்னர் அதை RIGHT CLICK செய்து RUN BY ADMINISTRATOR என்பதை கிளிக் செய்யவும். பின்னர் தங்களின் கணினியை LOG OFF செய்யவும். இப்போது ADMINISTRATIVE அக்கொண்டிற்கான LOG ON பட்டன் இருக்கும். உதவிக்கு கீழே படம்.

SAVEMODE என்றால் என்ன என்பதையும், அதன் முக்கியமான பணிகளை அடுத்த பதிவில் பார்க்கலாம்.

விண்டோஸ் 8: சந்தேகத் தளிர்களும் விளக்கங்களும்


முற்றிலும் மாறுபட்ட இயக்கத்துடன் வந்திருக்கும் விண்டோஸ் 8 ஆப்பரேட்டிங் சிஸ்டம், பெர்சனல் கம்ப்யூட்டர் பயன்படுத்துவோரிடையே கொஞ்சம் கொஞ்சமாக இடம் பெற்று வருகிறது. விண்டோஸ் 7 சிஸ்டமே போதும் என ஒதுங்கியவர்களும், இதன் பயன்பாடுகளில் பலவற்றை விரும்பி, முழுமையாக இதற்கு மாறி வருகின்றனர். பலர், விண்டோஸ் 8 சிஸ்டம் குறித்து முழுமையாக அறிந்த பின்னரே, அதற்கு மாறுவது குறித்துச் சிந்திக்க வேண்டும் என எண்ணி செயல்பட்டு வருகின்றனர். அவர்களுக்கான சில தகவல் துளிகள் இங்கு தரப்படுகின்றன.

1. விண்டோஸ் 8 ஆப்பரேட்டிங் சிஸ்டத் திற்கும், எக்ஸ்பி, விஸ்டா, விண் 2007 ஆகியவற்றிற்கும் இடையே உள்ள வேறுபாடுகள் என்ன?
விண் 8 சிஸ்டம் முற்றிலும் மாறுபட்ட முழுமையான செயல்பாட்டினைத் தருகிறது. விண் 2007க்கு முந்தைய ஆப்பரேட்டிங் சிஸ்டங்களுடன் இதனை ஒப்பிட்டால், இதில் கிடைக்கும் அனுபவம் புதுமையாகவே இருக்கும். ஆனால், விண் 2007 சிஸ்டத்தில் பழகியவர்களுக்கு மாறுதலான பயன்பாடுகள் ஓரளவேதான் இருக்கும். ஏனென்றால், விண்டோஸ் 2007 சிஸ்டத்திற்கு மக்களிடம் கிடைத்த பேராதரவினால், அதில் இயங்கும் பல்வேறு கூறுகளை, விண் 8 சிஸ்டத்திலும், மைக்ரோசாப்ட் அமைத்துள்ளது. யூசர் இன்டர் பேஸ் மற்றும் ஸ்டார்ட் ஸ்கிரீன் ஆகியவை மட்டுமே முற்றிலும் மாறுபட்டதாக உள்ளது.

2. விண்டோஸ் 8 சிஸ்டத்திற்கும் லினக்ஸ் சிஸ்டத்திற்கும் உள்ள வேறுபாடு என்ன?
புரோகிராமிங் மற்றும் பயன்பாட்டின் அடிப்படையில் இரண்டும் வேறுபடுகின்றன. விண்டோஸ் 8 சிஸ்டத்தின், செயல் இயக்க குறியீடுகளை மற்றவர்கள் அறிய முடியாது. ஆனால், லினக்ஸ் இயக்கக் குறியீடுகள், “திறவூற்று’ என அழைக்கப்படும் ஓப்பன் சோர்ஸ் அமைப்பில் உருவாக்கப்பட்டது. இதனைப் பெற்று, யார் வேண்டுமானாலும், தங்கள் வசதிக்கேற்ப மாற்றிக் கொள்ளலாம். லினக்ஸ் பல்வேறு நாடுகளில், பல மாறுபட்ட வடிவமைப்பில் கிடைக்கின்றன. இதனால், அதில் இணைந்து செயலாற்ற ட்ரைவர் புரோகிராம்களைத் தேடிப் பெற வேண்டும். மேலும், இதனைக் கற்றுக் கொண்டு இயக்குவது சற்று காலம் எடுக்கும் செயலாகும். விண்டோஸ் அப்படிப்பட்டது இல்லை. உலகெங்கும் ஒரே மாதிரியான இயக்கம் கொண்ட, இயக்குவதற்கு எளிதான சிஸ்டம் விண்டோஸ்.

3. ஸ்டார்ட் மெனு ஏன் இல்லை?
விண்டோஸ் 8 சிஸ்டம் குறித்து கருத்து தெரிவிக்கும் அனைவரும், இதுவரை விண்டோஸ் சிஸ்டத்தில் இருந்த ஸ்டார்ட் மெனு, இதில் இல்லை என்பதைக் குற்றமாக அல்லது வருத்தத்துடன் தெரிவிக்கின்றனர். ஸ்டார்ட் மெனுவிற்குப் பதிலாக, ஸ்டார்ட் ஸ்கிரீன் தரப்பட்டுள்ளது. இதில் அப்ளிகேஷன் புரோகிராம்கள் அனைத்தும் சதுர வடிவ ஓடுகளாக அடுக்கப்பட்டுள்ளன. விரல் அசைவில் அல்லது மவுஸ் தொடலில் இவை அழகாக நகர்ந்து நம் முன் தயாராக இருக்கின்றன. இந்த மாற்றத்தினை பெரும்பாலான மக்களின் விருப்பத்தினை அறிந்த பின்னர் கொண்டு வந்ததாக, மைக்ரோசாப்ட் அறிவித்துள்ளது. அனைத்து தரப்பினரும் இதனை வருங்காலத்தில் விரும்பிப் பயன்படுத்து வார்கள் எனவும் கூறியுள்ளது.

4. விண்டோஸ் 8 சிஸ்டத்தினை யு.எஸ்.பி. ட்ரைவில் இருந்து இயக்கலாம் என்பது உண்மையா?
விண்டோஸ் 8 ஆப்பரேட்டிங் சிஸ்டத்தின் ஒரு பதிப்பு விண்டோஸ் என்டர்பிரைஸ் (Windows Enterprise) என அழைக்கப்படுகிறது. இதில் விண்டோஸ் டு கோ (Windows To Go) என்று ஒரு இயக்க வழி தரப்படுகிறது. இதனை ஒரு யு.எஸ்.பி. ட்ரைவ் ஒன்றில் வைத்து இயக்கலாம். இது விண் 8 சிஸ்டத்தினை, யு.எஸ்.பி.ட்ரைவ் பயன்படுத்தும் கம்ப்யூட்ட ரில் பதியாது. மாறாக, யு.எஸ்.பி. ட்ரைவில் இருந்தே இயக்கும். யு.எஸ்.பி. ட்ரைவ், கம்ப்யூட்டரிலிருந்து எடுக்கப்பட்டால், 60 விநாடிகள், சிஸ்டம் இயங்கிய நிலையில் இருக்கும். மீண்டும் யு.எஸ்.பி. ட்ரைவினை இணைத்தால், சிஸ்டம் விட்ட இடத்தில் இருந்து இயங்கத் தொடங்கும். விண்டோஸ் 8 சிஸ்டம் பயன்படுத்தப்படும் ஒரு நிறுவனத்தில், அதன் அலுவலர்கள் எல்லாருக்கும் இந்த பயன்பாடு கிடைக்க வேண்டும் என்ற எண்ணத்துடன், மைக்ரோசாப்ட் விண்டோஸ் என்டர்பிரைஸ் என்ற அமைப்பினை, யு.எஸ்.பி. ட்ரைவில் வைத்து இயக்கும் வகையில் தந்துள்ளது. இதனை எந்த யு.எஸ்.பி. ட்ரைவிலும் வைத்து இயக்க முடியாது. இன்றைய நிலையில், மைக்ரோசாப்ட் மூன்று மாடல் யு.எஸ்.பி. ட்ரைவ்களை மட்டுமே, இதற்கென அங்கீகரித்துள்ளது.

5.விண் 8 சிஸ்டத்துடன், முந்தைய ஆப்பரேட்டிங் சிஸ்டமும் ஒரு கம்ப்யூட்டரில் இயங்கும் வகையில் டூயல் பூட் முறை அமைக்க முடியுமா?
முடியும். விண்டோஸ் 7 அல்லது விஸ்டா பயன்படுத்தப்படும் கம்ப்யூட்டரில், விண் 8 சிஸ்டத்தைப் பதிந்து, டூயல் பூட் முறையில் இயக்கலாம். இதற்கென சில வழிமுறைகளை மைக்ரோசாப்ட் அறிவித்துள்ளது. அதனைப் பின்பற்றித்தான் இந்த டூயல் பூட் முறை அமைக்கப்பட வேண்டும்.

6.விண்டோஸ் ஆர்.டி. என்பது என்ன? இது விண்டோஸ் 8 சிஸ்டம் போன்றதா? அல்லது மாறுபட்டதா?
விண்டோஸ் ஆர்.டி. (Windows RT) என்பது விண்டோஸ் 8 சிஸ்டத்தின் இன்னொரு வகையாகும். இது மொபைல் சாதனங் களுக்கான விண் 8 ஆப்பரேட்டிங் சிஸ்டம் என வைத்துக் கொள்ளலாம். ஸ்மார்ட் போன், டேப்ளட் பிசிக்கள் போன்ற மொபைல் சாதனங்கள், டெஸ்க்டாப் மற்றும் லேப் டாப் கம்ப்யூட்டரிலிருந்து முற்றிலும் மாறுபட்ட கட்டமைப்பைக் கொண்டு செயல்படுகின்றன. எனவே, இவற்றில் இயங்கும் வகையில் மைக்ரோசாப்ட் விண்டோஸ் ஆர்.டி. சிஸ்டத்தினைத் தந்துள்ளது.
இதில் ஆர்.டி. என்பது என்ன? என்று இதுவரை மைக்ரோசாப்ட் விளக்கம் தர வில்லை. ஆனால், பல வலைமனை எழுத்தர்கள், இதனை “Run Time” என்றும் “Windows Run Time” எனவும் குறிப்பிட்டுள்ளனர். ஆனால், மைக்ரோசாப்ட் எதனையும் ஏற்று அறிவிக்கவில்லை. வர்த்தக ரீதியாக, விண்டோஸ் 8ன் பிரிவாக ஒரு பெயரைக் கொடுக்க, மைக்ரோசாப்ட் இதனைப் பயன்படுத்தியுள்ளது என்றுதான் கொள்ள வேண்டியதுள்ளது.

7. விண்டோஸ் 8 சிஸ்டத்திற்கும் விண்டோஸ் போன் 8 க்கும் என்ன தொடர்பு?
விண்டோஸ் போன் 8 என்பது மொபைல் போன்களுக்கான நவீன ஆப்பரேட்டிங் சிஸ்டமாகும். இது விண்டோஸ் 8 சிஸ்டம் அமைப்பின்படி உருவாக்கப்பட்ட ஒன்றாகும். எனவே, விண்டோஸ் 8 சிஸ்டம் இயக்கப்படும் சாதனங்களுடன் இணைந்து இந்த சிஸ்டம் கொண்டுள்ள மொபைல் போன்கள் செயல்படும். விண்டோஸ் போன் 8 கொண்ட மொபைல் போன்கள் சில தற்போது கிடைக்கின்றன. நோக்கியாவின் லூமியா வரிசை போன்களும், எச்.டி.சி. விண்டோஸ் வரிசை போன்களும், இந்த சிஸ்டத்தினைக் கொண்டுள்ளன.

8. விண்டோஸ் 8 சிஸ்டத்திற்கும் ஸ்கை ட்ரைவிற்குமான தொடர்பு எப்படிப்பட்டது?
கிளவ்ட் கம்ப்யூட்டிங் முறையில், மைக்ரோசாப்ட் அமைத்துள்ள ஸ்டோரேஜ் ட்ரைவ் தான் ஸ்கை ட்ரைவ் ஆகும். விண்டோஸ் 8 சிஸ்டம் முழுமையாக, ஸ்கை ட்ரைவுடன் இணைந்து செயல்படுகிறது. நாம் விண்டோஸ் 8 சிஸ்டம் வாங்கும்போதே, நமக்கு ஸ்கை ட்ரைவில் 7 ஜிபி இடம் ஒதுக்கப்படுகிறது. நம் மைக்ரோசாப்ட் அக்கவுண்ட் மூலம் லாக் இன் செய்தால், விண்டோஸ் 8 சிஸ்டத்தில் நீங்கள் உருவாக்கும் பைல்கள் அனைத்தும் அதில் ஸ்டோர் செய்யப்படுகிறது. அப்டேட் செய்யப் படுகிறது. எனவே, நீங்கள் விண்டோஸ் 8 சிஸ்டத்தில் உருவாக்கும் பைல்களை, உலகின் எந்த மூலையில் இருந்தும், விண் 8 சிஸ்டம் பயன்படுத்தும் எந்த சாதனத்தின் வழியாகவும் பெற்று பயன்படுத்தலாம். இந்த வழிமுறையை (“Fetching”) என மைக்ரோசாப்ட் அழைக்கிறது. தமிழில் “தருவித்தல்’ என அழைக்கலாம். ஸ்கை ட்ரைவில் நாம் கட்டாயமாக நம் பைல்களை ஸ்டோர் செய்திட வேண்டியதில்லை. நாம் விரும்பினால் மட்டுமே இதனைப் பயன்படுத்திக் கொள்ளலாம்.

9. என்னுடைய நிறுவனத்தில் விண்டோஸ் எக்ஸ்பி மற்றும் விஸ்டா பயன்படுத்தி வருகிறேன். கட்டாயமாக அலுவலகக் கம்ப்யூட்டர்களில் விண்டோஸ் 8 பயன்படுத்த மாற்றிக் கொள்ள வேண்டுமா?
விண்டோஸ் எக்ஸ்பிக்கு தரும் சப்போர்ட்டினை மைக்ரோசாப்ட் விரைவில் நிறுத்த உள்ளது. பெருகி வரும் விண்டோஸ் 8 சிஸ்டம் பயன்பாட்டினைப் பார்க்கையில், மாறிக் கொள்வது நல்லது.
10. நான் விண்டோஸ் 7 பயன்படுத்தி வருகிறேன். நான் விண்டோஸ் 8 சிஸ்டத்திற்கு மாறிக் கொள்ள வேண்டுமா?
கட்டாயம் மாறிக் கொள்ளத் தேவை இல்லை. நீங்கள் எது போன்ற பணிகளுக்கு விண்டோஸ் 7 பயன்படுத்துகிறீர்கள் என்பதனைப் பொறுத்தது.

Windows Password Crack


Goto c:\windows\system32...
copy CMD.exe then paste into Desktop
Then Rename SETHC.exe Next copy the file goto c:\windows\system32 into Paste
Now says error Click YES Button Now Restart in Login Screen Press 5 Times SHIFT key
the beep sounds come then the CMD prompt Open NOw you Type Explore.exe then the windows Open without Passwords

Windows 8 Picture Password


1) Normally we can authenticate with our text passwords, so here we are using the series of Picture gestures that include the Circles, Straight lines, and Taps

2) For Enabling this feature make sure you make the following changes in your Computer

3) First go to the Windows Charms

4) Then Click Settings > PC settings

5) In the PC settings , Click the Windows Users

6) Now Select the Create a Picture Password and make your Picture password

7) Enjoy with this new type of unlocking your Computer method

Activate Windows XP by Notepad CMD


1. Open up Notepad.

2. Copy the following code and paste it in notepad.

Windows Registry Editor Version 5.00
[HKEY_LOCAL_MACHINE\SOFTWARE\Mi crosoft\Windows NT\CurrentVersion\WPAEvents]
"OOBETimer"=hex:ff,d5,71,d6,8b ,6a,8d,6f,d5,33, 93,f d
"LastWPAEventLogged"=hex:d5,07 ,05,00,06,00,07, 00,0 f,00,38,00,24,00,fd,02
[HKEY_LOCAL_MACHINE\SOFTWARE\Mi crosoft\Windows NT\CurrentVersion]
"CurrentBuild"="1.511.1 () (Obsolete data - do not use)"
"InstallDate"=dword:427cdd 95
"ProductId"="69831-640-1780577-45389"
"DigitalProductId"=hex:a4,00,0 0,00,03,00,00,00 ,36, 39,38,33,31,2d,36,34,30,2d,\
31,37,38,30,35,37,37,2d,34,35, 33,38,39,00,5a,00,00 ,00,41,32,32,2d,30,30,30,\
30,31,00,00,00,00,00,00,00,00, 0d,04,89,b2,15,1b,c4 ,ee,62,4f,e6,64,6f,01,00,\
00,00,00,00,27,ed,85,43,a2,20, 01,00,00,00,00,00,00 ,00,00,00,00,00,00,00,00,\
00,00,00,00,00,00,00,00,00,00, 00,31,34,35,30,34,00 ,00,00,00,00,00,00,ce,0e,\
00,00,12,42,15,a0,00,08,00,00, 87,01,00,00,00,00,00 ,00,00,00,00,00,00,00,00,\
00,00,00,00,00,00,00,00,00,00, 00,00,00,00,00,00,00 ,94,a2,b3,ac
"LicenseInfo"=hex:9e,bf,09,d0, 3a,76,a5,27,bb,f 2,da ,88,58,ce,58,e9,05,6b,0b,82,\
c3,74,ab,42,0d,fb,ee,c3,ea,57, d0,9d,67,a5,3d,6e,42 ,0d,60,c0,1a,70,24,46,16,\
0a,0a,ce,0d,b8,27,4a,46,53,f3, 17

3. Then save it in .reg extension. For example, save it as License.reg

4. Double click the saved file and click Yes if prompted.

5. DONE!


Complete List of Useful Shortcuts


Keyboard Shortcuts (Microsoft Windows)


1. CTRL+C (Copy)
2. CTRL+X (Cut)
3. CTRL+V (Paste)
4. CTRL+Z (Undo)
5. DELETE (Delete)
6. SHIFT+DELETE (Delete the selected item permanently without placing the item in the Recycle Bin)
7. CTRL while dragging an item (Copy the selected item)
8. CTRL+SHIFT while dragging an item (Create a shortcut to the selected item)
9. F2 key (Rename the selected item)
10. CTRL+RIGHT ARROW (Move the insertion point to the beginning of the next word)
11. CTRL+LEFT ARROW (Move the insertion point to the beginning of the previous word)
12. CTRL+DOWN ARROW (Move the insertion point to the beginning of the next paragraph)
13. CTRL+UP ARROW (Move the insertion point to the beginning of the previous paragraph)
14. CTRL+SHIFT with any of the arrow keys (Highlight a block of text)
SHIFT with any of the arrow keys (Select more than one item in a window or on the desktop, or select text in a document)
15. CTRL+A (Select all)
16. F3 key (Search for a file or a folder)
17. ALT+ENTER (View the properties for the selected item)
18. ALT+F4 (Close the active item, or quit the active program)
19. ALT+ENTER (Display the properties of the selected object)
20. ALT+SPACEBAR (Open the shortcut menu for the active window)
21. CTRL+F4 (Close the active document in programs that enable you to have multiple documents opensimultaneou sly)
22. ALT+TAB (Switch between the open items)
23. ALT+ESC (Cycle through items in the order that they had been opened)
24. F6 key (Cycle through the screen elements in a window or on the desktop)
25. F4 key (Display the Address bar list in My Computer or Windows Explorer)
26. SHIFT+F10 (Display the shortcut menu for the selected item)
27. ALT+SPACEBAR (Display the System menu for the active window)
28. CTRL+ESC (Display the Start menu)
29. ALT+Underlined letter in a menu name (Display the corresponding menu) Underlined letter in a command name on an open menu (Perform the corresponding command)
30. F10 key (Activate the menu bar in the active program)
31. RIGHT ARROW (Open the next menu to the right, or open a submenu)
32. LEFT ARROW (Open the next menu to the left, or close a submenu)
33. F5 key (Update the active window)
34. BACKSPACE (View the folder onelevel up in My Computer or Windows Explorer)
35. ESC (Cancel the current task)
36. SHIFT when you insert a CD-ROMinto the CD-ROM drive (Prevent the CD-ROM from automatically playing)

Dialog Box - Keyboard Shortcuts


1. CTRL+TAB (Move forward through the tabs)
2. CTRL+SHIFT+TAB (Move backward through the tabs)
3. TAB (Move forward through the options)
4. SHIFT+TAB (Move backward through the options)
5. ALT+Underlined letter (Perform the corresponding command or select the corresponding option)
6. ENTER (Perform the command for the active option or button)
7. SPACEBAR (Select or clear the check box if the active option is a check box)
8. Arrow keys (Select a button if the active option is a group of option buttons)
9. F1 key (Display Help)
10. F4 key (Display the items in the active list)
11. BACKSPACE (Open a folder one level up if a folder is selected in the Save As or Open dialog box)

Microsoft Natural Keyboard Shortcuts
1. Windows Logo (Display or hide the Start menu)
2. Windows Logo+BREAK (Display the System Properties dialog box)
3. Windows Logo+D (Display the desktop)
4. Windows Logo+M (Minimize all of the windows)
5. Windows Logo+SHIFT+M (Restorethe minimized windows)
6. Windows Logo+E (Open My Computer)
7. Windows Logo+F (Search for a file or a folder)
8. CTRL+WindowsLogo+F (Search for computers)
9. Windows Logo+F1 (Display Windows Help)
10. Windows Logo+ L (Lock the keyboard)
11. Windows Logo+R (Open the Run dialog box)
12. Windows Logo+U (Open Utility Manager)
13. Accessibility Keyboard Shortcuts
14. Right SHIFT for eight seconds (Switch FilterKeys either on or off)
15. Left ALT+left SHIFT+PRINT SCREEN (Switch High Contrast either on or off)
16. Left ALT+left SHIFT+NUM LOCK (Switch the MouseKeys either on or off)
17. SHIFT five times (Switch the StickyKeys either on or off)
18. NUM LOCK for five seconds (Switch the ToggleKeys either on or off)
19. Windows Logo +U (Open Utility Manager)
20. Windows Explorer Keyboard Shortcuts
21. END (Display the bottom of the active window)
22. HOME (Display the top of the active window)
23. NUM LOCK+Asterisk sign (*) (Display all of the subfolders that are under the selected folder)
24. NUM LOCK+Plus sign (+) (Display the contents of the selected folder)

MMC Console Windows Shortcut keys


1. SHIFT+F10 (Display the Action shortcut menu for the selected item)
2. F1 key (Open the Help topic, if any, for the selected item)
3. F5 key (Update the content of all console windows)
4. CTRL+F10 (Maximize the active console window)
5. CTRL+F5 (Restore the active console window)
6. ALT+ENTER (Display the Properties dialog box, if any, for theselected item)
7. F2 key (Rename the selected item)
8. CTRL+F4 (Close the active console window. When a console has only one console window, this shortcut closes the console)

Remote Desktop Connection Navigation


1. CTRL+ALT+END (Open the Microsoft Windows NT Security dialog box)
2. ALT+PAGE UP (Switch between programs from left to right)
3. ALT+PAGE DOWN (Switch between programs from right to left)
4. ALT+INSERT (Cycle through the programs in most recently used order)
5. ALT+HOME (Display the Start menu)
6. CTRL+ALT+BREAK (Switch the client computer between a window and a full screen)
7. ALT+DELETE (Display the Windows menu)
8. CTRL+ALT+Minus sign (-) (Place a snapshot of the active window in the client on the Terminal server clipboard and provide the same functionality as pressing PRINT SCREEN on a local computer.)
9. CTRL+ALT+Plus sign (+) (Place asnapshot of the entire client window area on the Terminal server clipboardand provide the same functionality aspressing ALT+PRINT SCREEN on a local computer.)

Friday, 4 July 2014

4 best website that will help to find missing dll files


There Have been a lots of situations that You get a missing DLL Files Error When Trying To install A software or maybe A game .and one of the most famous of the missing DLL files errors You receive is :

(Msvcr71.dll is Missing)
(D3dx9_41.dll is Missing)
(OPENAL32.DLL is Missing)
And This Is What makes people thinks that the problem is from the software or the game . and resolving this problem is very easy all you have to do is take the name of the file that showing in the error window and search for it on websites that are specialized in providing system DLL files , and then Copie on the following path in Windows by going to the disk: C to the Windows folder windows Find the System32 folder and place the file there .

And in this Blog Post I will show you how to find missing dll files

dll-files.com

One of Most Famous websites that Most of Professionals uses to fix Computers and operating systems , it offers you almost every DLL file you that you might need for the Windows operating system, simply enter the site and writes the file name then click on Search where you will find the file you’re looking for in the search results where you can click on it and download it by clicking on the word Download Zip-file. The site also gives you the ability to search for missing system files via alphabet order, in the case of any problems with the search for the file name on the site.

dllme.com

website just like the previous one and have really easy domain name and can be remembered easily , Characteristic search DLLme site that gives you an advantage called DvancedDll Search which is a feature that lets you search for the missing files in the system more accurately by adding more information about the missing file or semantic words to him to let the website do all the work to find the file you’re looking for
this webSite can also search for OCX and VPK missing files.

dlldump.com

this website can help you get files besides DLL files like ocx or OCX , where you can download more from the system files that you may need when you run a program or game. You can write the name of the missing file in the search box at the top right and simply download your missing files .

dlldll.com

This Website has mo than 15 million DLL files that windows Could possibly need this big number shows the power of this website . also the files are well organized and you can find them easily with no effort.

Windows 8 Complete List of keyboard shortcuts


1. Windows + T - Go to first item in Taskbar, continue with arrow keys

2. Windows + U - Open Ease of Access Centre

3.Windows + X - Open Power User Commands on Desktop

4.Windows + S - Search Settings

5.Windows + P - Display Projection Options

6.Windows + O - Disable screen rotation / orientation

7.Windows + R - Open Run dialog box

8. Windows + Q - Open Windows Apps Search

9. Windows + W - Search in Windows Settings

10. Windows + M - Minimize all Windows

11. Windows + N - Create new One Note

12. Windows + L - Lock your computer

13. Windows + Shift + M - Restore minimized Windows

14.Windows + Ctrl + F - Search for Computers in a network

15. Windows + F - Search for the Files in Computer

16. Windows + H - Open Share Panel

17.Windows + B - Set focus to Notification Area

18.Windows + E - Show Windows Explorer with File’s Tree View

19.Windows + E - Show Windows Explorer with File’s Tree View

20.Windows + K - Open Device Connections

21.Windows + C - Open Charms bar

22. Windows + I - Open settings including Control Panel, PC Info, Desktop, Personalization, Help

23. Windows + J - Toggle foreground between the filled and snapped applications

24.Windows + D - Toggle “Show Desktop”

25. Windows + Enter - Open Windows Narrator

26. Windows + Spacebar - Change the Keyboard Layout / Input Language

27. Windows + Page Down - Move Start Screen to the right side of screen

28. Windows + Alt + Enter - Open Media Center (If Media Center is Installed on your PC

29. Windows + Page Up - Move Start Screen to the left side of screen

30. Windows + Down Arrow - Minimize / Restore the currently active Windows

31. Windows + Up Arrow - Maximize the currently active Windows

32. Windows + Right Arrow - Dock the current Windows to right half of the screen

33. Windows + Left Arrow - Dock the current Windows to left half of the screen

34. Windows + Minus - Magnifier Zoom-Out 35. Windows + Plus - Magnifier Zoom-In

36. Windows + Esc - Close Magnifier

37. Windows + Shift + Right Arrow - Move the currently active Windows to the right side of monitor

38. Windows + Shift + Left Arrow - Move the currently active Windows to the left side of monitor

39. Windows + Shift + Down Arrow - Minimize / Restore the currently active Windows vertically, while maintaining its width

40. Windows + Shift + Up Arrow - Maximize the currently active Windows vertically, while maintaining its width

41. Windows + F1 - Open Windows Help and Support

42. Windows + Break - Display System Properties dialog box

43. Windows + Ctrl + Tab - Toggle through Applications and snap them as they cycle

44. Windows + Tab - Toggle through all Applications

45.Windows + Shift + Tab - Toggle through Applications in reverse order

46.Windows + Forward Slash (/) - Initiate IME (Input Method Editor) reconversion

47.Windows + Shift + Dot (.) - Move the gutter to the left

48. Windows + Dot (.) - Move the gutter to the right

49. Alt + T - Cut

50. Alt + V - Paste

51. Alt + P + E - Display Open With… dialog box

52. Alt + W - Create a new document or select a template

53. Windows + Comma - Temporarily view desktop

54. Alt + S + I - Invert the selection

55. Alt + R - Rename selected files

56.Alt + P + S - Insert label

57.Alt + D - Delete selected files or folder

58.Alt + P + R - Open properties

59. Alt + M - Move the files

60. Alt + S + A - Select all

61.Alt + C + P - Copy path to the file or folder

62.Alt + A - Open the special features.

63. Alt + E - Edit selected files

64. Alt + C + O - Copy selected items

65. Alt + H - Shows history of file versions

66. Alt + S + N - Deselect

67. Alt + N - Create a new folder

68. Alt + Shift - Change Keyboard Language layout if multiple language layouts are active

69.Ctrl + Mouse Scroll Wheel - Change Size of Icon

70. F11 - Toggle Full Screen Depeche Mode

Sunday, 29 June 2014

How to Repair a Windows 7 Computer


1.Power up your computer while holding down the F8 key until you see the Windows Advanced Boot Options screen. If your computer manufacturer installed a repair program, select the Repair Your Computer option, and press Enter. Select your keyboard layout, and enter your user name and password.

2.If the Repair Your Computer option is not an available option, then insert your System Repair Disc or your Windows 7 DVD into your DVD drive, and press your ESC key until your computer restarts. Press a key when prompted to boot from the DVD. In the Install Windows screen that appears, click on Next, then click Repair Your Computer. When the System Recovery Options wizard opens, make sure your Windows 7 installation is selected, then, with the option to use recovery tools selected, click the Next button.

3.NOTE: You won't get the "Press any key to boot from DVD..." prompt if your BIOS is not configured to boot (start) from your DVD drive first. You will need to enter the BIOS/Setup configuration at the initial boot screen--it's the first screen you see when you start your computer, usually you will press the Delete key, F2, F10, or some other "F key" to enter BIOS/Setup. Once in BIOS/Setup, you can change the Boot Device Order so that your computer tries to boot from your DVD before it tries your hard drive. There are too many versions of BIOS/Setup to cover them here in any detail. Consult your documentation, or a skilled computer technician for help with this.

4.In the System Recovery Options window, choose the recovery tool that you want to use and follow the instructions.
5.If your computer doesn't restart after using a tool, either choose another tool from the System Recovery Options wizard, or eject the Windows 7 DVD and select Shut Down or Restart.
The following Tools are available from the Repair Your Computer Wizard:

Startup Repair
This will run diagnostic software and apply solutions, if they are available. You can view the results and any fixes by clicking on View Diagnostics and Repair Details.

System Restore
This allows you to restore your computer to the way it was at an earlier time--going back to a time (System Restore Point) before the problems began would be good, right? The Windows 7 System Restore feature must have been enabled for this to be a repair option for you. It's enabled by default, so unless you manually disabled it you can use this sometimes invaluable repair tool.

System Image Recovery
If you created a Recovery Disk at some point, then you can use it to replace everything on your hard drive. Keep in mind that this will overwrite (erase, delete, destroy) all of the data presently on your hard drive. It will return the hard drive to the state it was in when you first made the Recovery Disk. If you don't know that your important data is backed-up, or otherwise secure, then consult with a skilled computer technician before you take the leap.

Windows Memory Diagnostics
This will perform diagnostics on your computer memory (RAM) and report any problems it finds. This tool will require you to restart your computer.

Facebook hacking websites


Friends all of you are always interested in hacking facebook accounts . But let me tell you something if you are using any website or any software except some , you can't . 


These software are mostly key-loggers and tracking programs that record your keystrokes and action and steal personal information from your computer in the background and send it to their master servers. So ultimately a hacker wannabe gets hacked, how ironic!

So never open facebook hacking websites like some mentioned below:

1) freefacebookaccounthacker.com
2) getfbhack.com
3) fbaccountshack.com

there are thousands but never use any , because none of them works.

Try To Memorize These Top Windows 8 Shortcut Keys !


1. Press the Windows key to open the Start screen or switch to the Desktop (if open).
2. Press the Windows key + D opens the Windows Desktop.
3. Press the Windows key + .to pin and unpin Windows apps on the side of the screen.
4. Press the Windows key + X to open the power user menu, which gives you access to many of the features most power users would want (e.g. Device Manager and Command Prompt).
5. Press the Windows key + C to open the Charms.
6. Press the Windows key + I to open the Settings, which is the same Settings found in Charms.
7. Press and hold the Windows key + Tab to show open apps.
8. Press the Windows key + Print screen to create a screen shot, which is automatically saved into your My Pictures folder.

Watch Live TV on Your PC For Free


WATCH LIVE TV FOR FREE IN VLC MEDIA PLAYER(Even If You Have Low Internet Speed)

Watch Live TV on Your PC For Free


Now you can watch free Tv on your pc by just using a VLC player.
Step 1 : First of all you need to have VLC player, if you don’t have vlc player kindly download and install it

Step 2 : Now open Vlc Player, Press Ctrl + N.

Step 3 : Enter the url of the streaming channel. For example ifyou want to view B4u Music you need to add url

rtsp://217.146.95.166:554/playlist/ch12zqcif.3gp

In the url field and then select play option

Step 4 : After you click play in the above step, the channel will start streaming and you can watch your favorite channels.

Here is the List of many other channels which you will love to watch Channel Name And Link !

NDTV rtsp://ss1c6.idc.mundu.tv:554/prf0/cid_33.sdp

NDTV Profit rtsp://ss1c6.idc.mundu.tv:554/prf0/cid_31.sdp

Times Now rtsp://ss1c6.idc.mundu.tv:554/prf0/cid_2.sdp

Aaj Tak rtsp://ss1c6.idc.mundu.tv:554/prf0/cid_4.sdp

CNBC Aawaz rtsp://ss1c6.idc.mundu.tv:554/prf1/cid_34.sdp

CNBC TV 18 rtsp://ss1c6.idc.mundu.tv:554/prf0/cid_35.sdp

Headlines Today rtsp://ss1c6.idc.mundu.tv:554/prf0/cid_7.sdp

NDTV 24×7 rtsp://ss1c6.idc.mundu.tv:554/prf0/cid_29.sdp

NK News rtsp://94.75.250.53:554/rtplive/rknews.sdp

RAJ News rtsp://94.75.250.220:1935/live/rajnews2.sdp

ETV rtsp://94.75.250.53/rtplive/etv2low.sdp

Studio N rtsp://94.75.250.220:1935/live/studion2

SVBC rtsp://94.75.250.220/rtplive/svbclow

Zoo Vision rtsp://stream.zoovision.com/live.sdp

B4u Music rtsp://217.146.95.166:554/playlist/ch12zqcif.3gp

iMusic rtsp://217.146.95.166:554/playlist/ch26yqcif.3gp

Zee Tamil rtsp://121.244.145.226:554/prf1/cid_54.sdp

Zee Kannad rtsp://121.244.145.226:554/prf1/cid_55.sdp

Zee Bangla rtsp://121.244.145.226:554/prf1/cid_52.sdp

Music Box rtsp://stream.the.sk/live/musicbox/musicbox-3m.3gp

Bella Tv rtsp://217.146.95.166:554/playlist/ch29yqcif.3gp

Fashion Tv rtsp://217.146.95.166:554/playlist/ch27yqcif.3gp

Adventure rtsp://video3.multicasttech.com/AFTVAdventure3GPP296.sdp

Horror rtsp://video2.multicasttech.com/AFTVHorror3GPP296.sdp

Comedy rtsp://video3.multicasttech.com/AFTVComedy3GPP96.sdp

Classic rtsp://video3.multicasttech.com/AFTVClassics3GPP296.sdp

Crime rtsp://video2.multicasttech.com/AFTVCrime3GPP296.sdp

Mystery rtsp://video2.multicasttech.com/AFTVMystery3GPP296.sdp

Clubbing Tv rtsp://217.146.95.166:554/playlist/ch21yqcif.3gp

Aaj Tak rtsp://ss1c6.idc.mundu.tv:554/prf0/cid_4.sdp

CNBC Aawaz rtsp://ss1c6.idc.mundu.tv:554/prf1/cid_34.sdp

CNBC TV 18 rtsp://ss1c6.idc.mundu.tv:554/prf0/cid_35.sdp

Headlines Today rtsp://ss1c6.idc.mundu.tv:554/prf0/cid_7.sdp

NDTV 24×7 rtsp://ss1c6.idc.mundu.tv:554/prf0/cid_29.sdp

NDTV rtsp://ss1c6.idc.mundu.tv:554/prf0/cid_33.sdp

NDTV Profit rtsp://ss1c6.idc.mundu.tv:554/prf0/cid_31.sdp

Times Now rtsp://ss1c6.idc.mundu.tv:554/prf0/cid_2.sdp

NK News rtsp://94.75.250.53:554/rtplive/rknews.sdp

RAJ News rtsp://94.75.250.220:1935/live/rajnews2.sdp

ETV rtsp://94.75.250.53/rtplive/etv2low.sdp

Studio N rtsp://94.75.250.220:1935/live/studion2

SVBC rtsp://94.75.250.220/rtplive/svbclow

Zee Tamil rtsp://121.244.145.226:554/prf1/cid_54.sdp

Zee Kannad rtsp://121.244.145.226:554/prf1/cid_55.sdp

Zee Bangla rtsp://121.244.145.226:554/prf1/cid_52.sdp

Music Box rtsp://stream.the.sk/live/musicbox/musicbox-3m.3gp

Zoo Vision rtsp://stream.zoovision.com/live.sdp

B4u Music rtsp://217.146.95.166:554/playlist/ch12zqcif.3gp

iMusic rtsp://217.146.95.166:554/playlist/ch26yqcif.3gp

Adventure rtsp://video3.multicasttech.com/AFTVAdventure3GPP296.sdp

Horror rtsp://video2.multicasttech.com/AFTVHorror3GPP296.sdp

Comedy rtsp://video3.multicasttech.com/AFTVComedy3GPP96.sdp

Classic rtsp://video3.multicasttech.com/AFTVClassics3GPP296.sdp

Crime rtsp://video2.multicasttech.com/AFTVCrime3GPP296.sdp

Mystery rtsp://video2.multicasttech.com/AFTVMystery3GPP296.sdp

Clubbing Tv rtsp://217.146.95.166:554/playlist/ch21yqcif.3gp

Bella Tv rtsp://217.146.95.166:554/playlist/ch29yqcif.3gp

Fashion Tv rtsp://217.146.95.166:554/playlist/ch27yqcif.3gp

NDTV rtsp://ss1c6.idc.mundu.tv:554/prf0/cid_33.sdp

NDTV Profit rtsp://ss1c6.idc.mundu.tv:554/prf0/cid_31.sdp

Times Now rtsp://ss1c6.idc.mundu.tv:554/prf0/cid_2.sdp

Aaj Tak rtsp://ss1c6.idc.mundu.tv:554/prf0/cid_4.sdp

CNBC Aawaz rtsp://ss1c6.idc.mundu.tv:554/prf1/cid_34.sdp

CNBC TV 18 rtsp://ss1c6.idc.mundu.tv:554/prf0/cid_35.sdp

Headlines Today rtsp://ss1c6.idc.mundu.tv:554/prf0/cid_7.sdp

NDTV 24×7 rtsp://ss1c6.idc.mundu.tv:554/prf0/cid_29.sdp

NK News rtsp://94.75.250.53:554/rtplive/rknews.sdp

RAJ News rtsp://94.75.250.220:1935/live/rajnews2.sdp

ETV rtsp://94.75.250.53/rtplive/etv2low.sdp

Studio N rtsp://94.75.250.220:1935/live/studion2

SVBC rtsp://94.75.250.220/rtplive/svbclow

Zoo Vision rtsp://stream.zoovision.com/live.sdp

B4u Music rtsp://217.146.95.166:554/playlist/ch12zqcif.3gp

iMusic rtsp://217.146.95.166:554/playlist/ch26yqcif.3gp

Zee Tamil rtsp://121.244.145.226:554/prf1/cid_54.sdp

Zee Kannad rtsp://121.244.145.226:554/prf1/cid_55.sdp

Zee Bangla rtsp://121.244.145.226:554/prf1/cid_52.sdp

Music Box rtsp://stream.the.sk/live/musicbox/musicbox-3m.3gp

Bella Tv rtsp://217.146.95.166:554/playlist/ch29yqcif.3gp

Fashion Tv rtsp://217.146.95.166:554/playlist/ch27yqcif.3gp

Adventure rtsp://video3.multicasttech.com/AFTVAdventure3GPP296.sdp

Horror rtsp://video2.multicasttech.com/AFTVHorror3GPP296.sdp

Comedy rtsp://video3.multicasttech.com/AFTVComedy3GPP96.sdp

Classic rtsp://video3.multicasttech.com/AFTVClassics3GPP296.sdp

Crime rtsp://video2.multicasttech.com/AFTVCrime3GPP296.sdp

Mystery rtsp://video2.multicasttech.com/AFTVMystery3GPP296.sdp

HOW TO SET PASSWORD ON ANY APPLICATION IN PC


Hello friends, today I am going to tell you a trick to make your pc softwares password protected. It means whenever anyone open any software in your pc then he/she will be asked for a password if the user don’t know the password then he can not use the software. If you are interested to protect your pc softwares with password then just follow below steps :-

STEP 1:
First of all download a software named Password Door to your pc
Download Link : http://goo.gl/cihQop [Download Size: Just 594.85 KB]

STEP 2:
Now install it to your pc, while installing , it will ask you to enter a password which will be used to open the password protected softwares.

STEP 3:
Now open Password Door with the help of password which you have entered while installing
Now Click on protect a program.

STEP 4:
Now You’ll see a list of all program on which you can set password.

Select the app from the list and make it password protect.

Now whenever you or any other user open password protected app, app will ask for the password. if you know the password only then you can access the application.

You can remove password from apps anytime.

NOTE: If you are thinking, your little bro or sis uninstall Password Door to access the application, then they can’t do it, because this program will ask for the same password to uninstall it from pc.

How Disable/Enable USB port:


1. Goto run
2. Type 'regedit' without quotes
3.Click on HKEY_LOCAL_MACHINE
4.goto SYSTEM
5. Click on CurrentControlSet
6. Click on services
7. Goto USBSTOR
8. Double click on 'Start' where value is 3
9. Now change the value data with 4
10. Now press ok and refresh your desktop your USB port is disabled, to enable the usb port replace the value 4 with 3.


Most used and simple methods to reset Windows password


Windows give you the option of having a Windows password to log on.This is useful when more than one user profiles are enabled. "I forgot Windows password. How do I reset my Windows password?" is a hot topic nowadays. You should set strong Windows password for better security. But you should also know how to make a password reset disk in advance to in case that you forget the password in future, or how to eliminate the password for more convenient login. Now you will see some cases and the solution of problem.

You can't log into computer

The problem that how to reset Windows password is linked with a forgotten Windows password for most of the time. Many people look for a solution to this problem is easily because they forgot Windows password and can't log into the computer anymore. If you came have a similar problem, you can reset Windows password by using several methods.

1.Free Windows password recovery tools
Windows password recovery tools are applications used to recover, or reset lost user and administrator passwords in Windows operating systems. Password recovery tools can "crack" passwords. Here are the best, free tools available.

-Ophcrack http://ophcrack.sourceforge.net/ The Ophcrack Windows password cracker is the best free Windows password recovery tool now. With Ophcrack, you don't need to access to Windows to retrieve the lost passwords. Download for free, burn it to a CD and boot from the CD. The Ophcrack application starts, recovers the passwords automatically. Ophcrack can run on Windows 7, Windows Vista, and Windows XP.

-Offline NT Password & Registry Editor http://pogostick.net/~pnh/ntpasswd/cd110511.zip Offline NT Password & Registry Editor operates differently than most password recovery tools in that it deletes the Windows password covering it. Download it , burn it to CD. You boot from a burned CD. After you run the app, you can log in to your Windows account without entering a password at all.
Offline NT Password & Registry works on Windows 7, Windows Vista, Windows 2000, and Windows NT.

-PC Login Now http://www.pcloginnow.com/ works differently than other password recovery programs. Instead of finding and displaying your current Windows password, PC Login Now erases it, letting you to access Windows without a password.
Download it , burn it to CD. Then your computer will boot with PC Login Now
The PC Login Now causes Windows to notice a possible hard drive problem on the first reboot after erasing the password. PC Login Now supports Windows 7, Windows Vista, and Windows XP.

2.Use Windows password reset disk
A Windows password reset disk can be created in advance to reset Windows password if you have such a CD here are the steps recover your Windows password.

-Boot your computer and insert the password reset CD in computer.
-Click your user account name and hit Enter.
-Click OK when an error message comes out.
-Click the “Reset password” under the password box.
-When Password Reset Wizard comes out, follow the steps to create a new password.
-Log on with your new password.

When you can log in as Administrator

Usually every user has numerous user accounts on his computer. If you forgot Windows password you can still log into the computer through another admin account. Please follow the steps to reset that forgotten password.

1.Use “lusrmgr.msc”
-Click the Start button, type "lusrmgr.msc" in the Search box, and click OK.
-Then "Local Users and Groups" opens.
-Expand the folder titled users on the Local users and groups window.
-Double-click "Local Users and Groups", and then click Users.
-Right-click the username which you need to change the password, and select Reset Password.
-Type and verify the new password.

2.Reset Windows password from the Command Prompt
With Command Prompt you can monitor all the user of the computer.
-Click the Start button, type "cmd" in the Search box, and click OK.
-Type net user amf newpass (amf is the locked admin account's name and newpass is the new password) and press Enter. Now you have successfully created a new password on the locked admin account.
-Type shutdown -r -t 00 and press Enter.

Your computer should be rebooted automatically and then you can log in Windows with the new password. It is a very simple way to change the password of any users from the Command Prompt. But you can change the password if you have Administrator privileges.

You can log in with the correct Windows password

It’s very simple to change your current Windows password.
-Log into your user account using a password.
-Open the User Accounts window by clicking Start - Control Panel - Family Safety and User Accounts - User Accounts.
- Click the “Change your password” link.

-Type your current password, type the new password, then enter it again, click Change password button.


Useful RUN Commands !


1. Accessibility Controls - access.cpl
2. Accessibility Wizard - accwiz
3. Add Hardware Wizard - hdwwiz.cpl
4. Add/Remove Programs - appwiz.cpl
5. Administrative Tools - control admintools
6. Automatic Updates - wuaucpl.cpl
7. Bluetooth Transfer Wizard - fsquirt
8. Calculator - calc
9. Certificate Manager - certmgr.msc
10. Character Map - charmap
11. Check Disk Utility - chkdsk
12. Clipboard Viewer - clipbrd
13.Command Prompt - cmd
14. Component Services - dcomcnfg
15. Computer Management - compmgmt.msc
16. Control Panel - control
17. Date and Time Properties - timedate.cpl
18. DDE Shares - ddeshare
19. Device Manager - devmgmt.msc
20. Direct X Troubleshooter - dxdiag
21. Disk Cleanup Utility - cleanmgr
22. Disk Defragment - dfrg.msc
23.Disk Management - diskmgmt.msc
24. Disk Partition Manager - diskpart
25. Display Properties - control desktop
26. Display Properties - desk.cpl
27. Dr. Watson System Troubleshooting Utility - drwtsn32
28.Driver Verifier Utility - verifier
29.Event Viewer - eventvwr.msc
30.Files and Settings Transfer Tool - migwiz
31. File Signature Verification Tool - sigverif
32. Findfast - findfast.cpl
33.Firefox - firefox
34. Folders Properties - control folders
35. Fonts - control fonts
36. Fonts Folder - fonts
37. Free Cell Card Game - freecell
38. Game Controllers - joy.cpl
39. Group Policy Editor (for xp professional) - gpedit.msc
40. Hearts Card Game - mshearts
41. Help and Support - helpctr
42.HyperTerminal - hypertrm
43. Iexpress Wizard - iexpress
44. Indexing Service - ciadv.msc
45.Internet Connection Wizard - icwconn1
46.Internet Explorer - iexplore
47. Internet Properties - inetcpl.cpl
48. Keyboard Properties - control keyboard
49. Local Security Settings - secpol.msc
50. Local Users and Groups - lusrmgr.msc
51. Logs You Out Of Windows - logoff
52. Malicious Software Removal Tool - mrt
53. Microsoft Chat - winchat
54. Microsoft Movie Maker - moviemk
55. Microsoft Paint - mspaint
56. Microsoft Syncronization Tool - mobsync
57. Minesweeper Game - winmine
58. Mouse Properties - control mouse
59. Mouse Properties - main.cpl
60. Netmeeting - conf
61. Network Connections - control netconnections
62. Network Connections - ncpa.cpl
63. Network Setup Wizard - netsetup.cpl
64. Notepad - notepad
65. Object Packager - packager
66. ODBC Data Source Administrator - odbccp32.cpl
67. On Screen Keyboard - osk
68. Outlook Express - msimn
69. Paint - pbrush
70. Password Properties - password.cpl
71. Performance Monitor - perfmon.msc
72. Performance Monitor - perfmon
73. Phone and Modem Options - telephon.cpl
74.Phone Dialer - dialer
75.Pinball Game - pinball
76.Power Configuration - powercfg.cpl
77.Printers and Faxes - control printers
78. Printers Folder - printers
79. Regional Settings - intl.cpl
80. Registry Editor - regedit
81. Registry Editor - regedit32
82.Remote Access Phonebook - rasphone
83.Remote Desktop - mstsc
84.Removable Storage - ntmsmgr.msc
85. Removable Storage Operator Requests - ntmsoprq.msc
86. Resultant Set of Policy (for xp professional) - rsop.msc
87. Scanners and Cameras - sticpl.cpl
88.Scheduled Tasks - control schedtasks
89.Security Center - wscui.cpl
90. Services - services.msc
91. Shared Folders - fsmgmt.msc
92. Shuts Down Windows - shutdown
93. Sounds and Audio - mmsys.cpl
94.Spider Solitare Card Game - spider
95.SQL Client Configuration - cliconfg
96. System Configuration Editor - sysedit
97. System Configuration Utility - msconfig
98.System Information - msinfo32
99. System Properties - sysdm.cpl
100. Task Manager - taskmgr
101. TCP Tester - tcptest
102. Telnet Client - telnet
103. User Account Management - nusrmgr.cpl
104. Utility Manager - utilman
105. Windows Address Book - wab
106.Windows Address Book Import Utility - wabmig
107. Windows Explorer – explorer

Tuesday, 24 June 2014

Increase your RAM and so system speed


1). Start any application, say Word . Open some
large documents.

2). Press CTRL+SHIFT+ESC to open Windows
Task Manager and click Processes tab and sort
the list in descending order on Mem Usage .
You will notice that WINWORD.EXE will be
somewhere at the top, using multiple MBs of
memory.

3). Now switch to Word and simply minimize it.
(Don't use the Minimize All Windows option of
the task bar).

4). Now go back to the WindowsTask Manager
and see where WINWORD.EXE is listed. Most
probably you will not find it at the top. You will
typically have to scroll to the bottom of the list
to find Word . Now check out the amount of
RAM it is using. Surprised? The memory
utilization has reduced by a hugeamount.

5). Minimize each application thatyou are
currently not working onby clicking on the
Minimize button & you can increase the amount
of available RAM by a substantial margin.
Depending upon the number and type of
applications you use together, the difference
can be as much as 50 percent of extra RAM.
In any multitasking system, minimizing an
application means that it won't be utilized by
the user right now. Therefore, the OS
automatically makes the application use virtual
memory & keeps bare minimum amounts of the
code in physical RAM.

Gadgets Not Displaying In Windows 7 : Problem Solved!


How to Fix Gadgets not Displaying Correctly in Windows 7?
Note:
If you have gadgets that are displaying on your Windows 7 desktop improperly as black, white, blank, or just messed up, then this will show you how to fix them.

You must be logged in as an administrator to be able to do this tutorial.
If you have a 3rd party firewall program installed, then also check to make sure that the gadgets are allowed in the firewall and are not being blocked in that program's exception settings.

Solution 1:

Automatically Using a BAT File Download
NOTE: This does the same thing as in OPTION TWO below, but automatically.

1. Click on the link below to download the file below.
Reset Gadgets.bat

http://www.mediafire.com/?zbcw34hax1wv5z6

2. Click on Save (if prompted), and save the .bat file to your desktop.

3. Right click on the downloaded .bat file and click on Run as administrator.

4. If prompted by UAC, then click on Yes.

5. You will see a command prompt flash open and close as the .bat file runs.

6. When finished, restart the computer to apply.

7. Check to see if the gadgets on your desktop are displaying correctly now. If not, then try uninstalling and reinstalling the still bad gadget, or do a System Restore using a restore point dated before the problem.

Solution 2:

Manually in a Elevated Command Prompt

NOTE: This does the same thing as in OPTION ONE above, but manually.
1. Open a elevated command prompt (right click - Run as administrator)

2. In the elevated command prompt, copy and paste each command below and press Enter one at a time. After each time your press Enter, you will need to click on OK before doing the next command.
net stop sidebar.exe
regsvr32 msxml3.dll
regsvr32 scrrun.dll
regsvr32 jscript.dll
regsvr32 atl.dll
Regsvr32 "%ProgramFiles%\Windows Sidebar\sbdrop.dll"
Regsvr32 "%ProgramFiles%\Windows Sidebar\wlsrvc.dll"

reg delete "HKEY_CURRENT_USER\Software\Microsoft\Windows\CurrentVersion\Internet Settings\Zones" /f
NOTE: This command will reset the security zones in Internet Explorer back to the default settings.
net start sidebar.exe
3. Restart the computer to apply.

4. Check to see if the gadgets on your desktop are displaying correctly now. If not, then try uninstalling and reinstalling the still bad gadget, or do a System Restore using a restore point dated before the problem.

Update-windows-os-without-internet-connection


Hello readers today tutorial is very useful for all of you , because most of the guys windows . In this tutorial i am gonna tell you a way to update your Windows OS without using your internet connection , Actually here we will use an software which will automatically update your Os you just have too run that tool . Cool isn't it ? lol

Well whenever i install my new windows , it will automatically start downloading their updates due to that my internet connection speed becomes so slow. yes i know this is sad . Don't worry this tutorial is very easy , if you are our loyal reader then you must know we made tutorial easy .  

How to update windows OS without having Internet Connection ?
For this you need a software name Autopatcher , Just Follow the simple steps Friends. 
Go to any cyber cafe or your friend house where you can download this software . ( why don't you download this by using your school Internet  )
Download Autopatcher from Here >
http://www.softpedia.com/get/System/OS-Enhancements/AutoPatcher-Updater.shtml
Run this software . 
Select your OS .
Now check your computer is 32-bit or 64-bit . ? For this Go to Your Computer Properties and check " System Type " .
For 32-bit choose " X86 " , if your computer supports 64-bit then use " X64 " .
Now choose Select all updates .
After the Download Completes , then copy the file in your USB .
Now Run this file on your Home Computer . 
and you are Done